Food & Drink
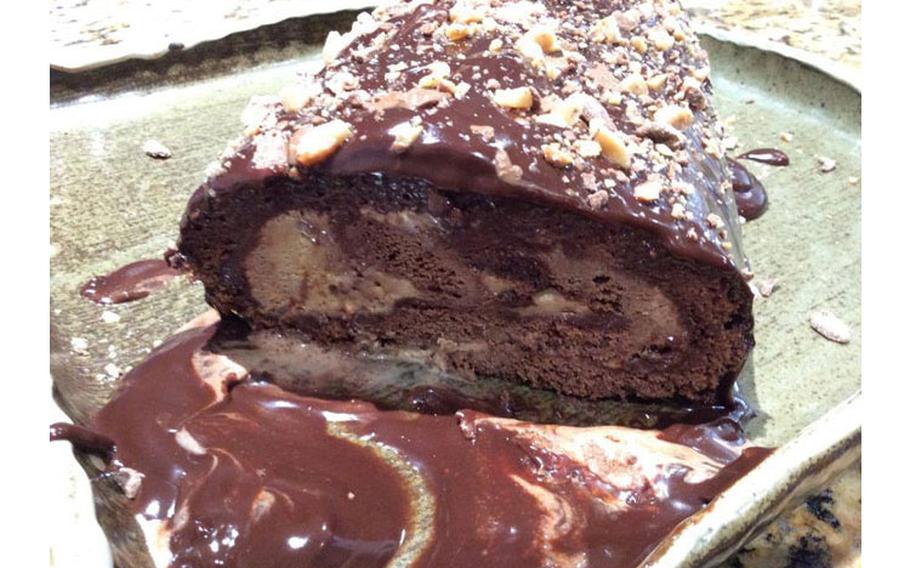
Valentine’s Day Recipe: Decadent chocolate ice cream cake
Annie's Chamorro Kitchen February 3, 2024

()
Some of my favorite desserts are chocolate cake, coffee ice cream, and toffee candy. This dessert combines all three in one very decadent dessert.
If you’ve read through my directions below, you may be thinking that this is a difficult dessert to make. Don’t let the number of steps fool you, however. This is actually very simple to make; just follow each step as I’ve described them below and before you know it, you’ll be enjoying this heavenly dessert! The only hard part is waiting for the ice cream to re-harden!
Give my recipe a try. I know you’ll love it.
Ingredients
Cake:
1/4 cup cocoa powder
1/3 cup plus 2 tablespoons cake flour
1 tablespoon instant espresso powder
1/8 teaspoon salt
1/2 stick unsalted butter, melted
3 large eggs
2 large egg YOLKS
1/2 cup white, granulated sugar
Filling:
1 cup milk chocolate chips
1/2 cup half-and-half (or heavy cream)
Half gallon coffee ice cream (or your favorite flavor)
1/2 cup toffee bits
Ganache:
1 1/2 cups semisweet chocolate chips
1 cup half-and-half (or heavy cream)
Topping:
1/2 cup toffee bits
Directions
1. In a small mixing bowl, sift together the cocoa powder and cake flour. Add the instant espresso powder and salt to the bowl. Whisk to combine.
2. In a microwave-safe bowl, melt the butter. Set aside to cool.
3. Place a small pot filled with about 2 inches of water over medium heat; bring to a simmer. In a large heat-safe mixing bowl, place the eggs, egg yolks, and sugar. Place the egg and sugar mixture over the simmering water, whisking constantly until the mixture is warm to the touch.
4. Switch to a hand-held mixer. Mix on high speed until the mixture thickens and turns a very pale yellow.
5. Fold the dry ingredients into the thickened egg mixture.
6. Drizzle the cooled melted butter down the side of the bowl. Gently FOLD the butter into the batter. Do NOT overmix; the batter will be very airy and light.
7. Line a large baking pan (a jelly-roll pan works well) with parchment paper. Pour the batter onto the lined pan. Gently and evenly spread batter out over the pan (be careful not to over-handle the batter as you spread it out; you do NOT want to deflate the air bubbles).
8. Bake at 450 degrees for 7 minutes.
9. While the cake is still warm, flip it out onto a clean dish cloth that’s been dusted with cocoa powder. Peel the parchment paper off the cake.
10. Sprinkle more cocoa powder over the cake. Roll the cake — including the dish cloth — starting at the short edge. Set aside until the cake is completely cooled.
11. After the cake is completely cooled, carefully unroll it.
12. Make the ganache for the filling. In a small microwave-safe bowl, heat the 1/2 cup of half-and-half for about a minute. Add the milk chocolate chips to the heated half-and-half, whisking until the chocolate melts and the mixture is smooth.
13. Spread the ganache over the cake, staying about 1 inch from the edge.
14. Spread the ice cream over the cake. I found it easier to use a spatula to “slice” pieces of ice cream, then I placed the slices of ice cream over the cake, staying about 1 1/2 inches from the edge.
15. Sprinkle 1/2 cup of toffee bits over the ice cream.
16. Re-roll the cake, jell-roll style, starting from the short edge. Be careful not to squeeze too tightly or all of the ice cream and chocolate ganache will ooze out of the cake.
17. Tightly wrap the rolled cake with plastic wrap. Place in the freezer and freeze until the ice cream firms up.
18. To finish the cake, prepare more ganache using the remaining half-and-half and semisweet chocolate chips. Once again, heat the half-and-half in the microwave for a minute. Add the semisweet chocolate chips to the hot half-and-half, whisking until smooth and creamy. Pour the ganache over the cake. Sprinkle with the remaining 1/2 cup of toffee bits.
19. Slice the cake, serve and ENJOY!